Are you confident about the security of your WordPress website? I know you have a strong password and you give no room for the attackers to take advantage of old themes and plugins as you update them on time.
Still, a brute force attack is enough for sneakers to get your site credentials. So, what is the best method to secure your WP site?
Have you heard of two-factor authentication? I guess you have! In case you haven’t, you will read more about it in this post. And, you can implement the same for your site as well.
How to Add Two Factor Authentication in WordPress Login?
Before one gets into the core of this blog post, at least a brief idea about two-factor authentication is mandatory.
What is Two Factor Authentication?
Simply put, two factor authentication is an extra layer of security over your online accounts be it a website, email or social profiles. Once you enter your password, you should enter the unique code, which you get via email or SMS to login successfully into your account.
As long as you are the only authority of your phone number and email, stealing your login details is impossible.
I hope you got a short but clear idea of what two factor authentication is. In this article, you are going to read how to get it on your website.
So, shall we begin?
How to Add Two Factor Authentication in WordPress Login?
Obviously, you have to install a plugin to get two factor authentication in WP login. Just follow the steps given below for that.
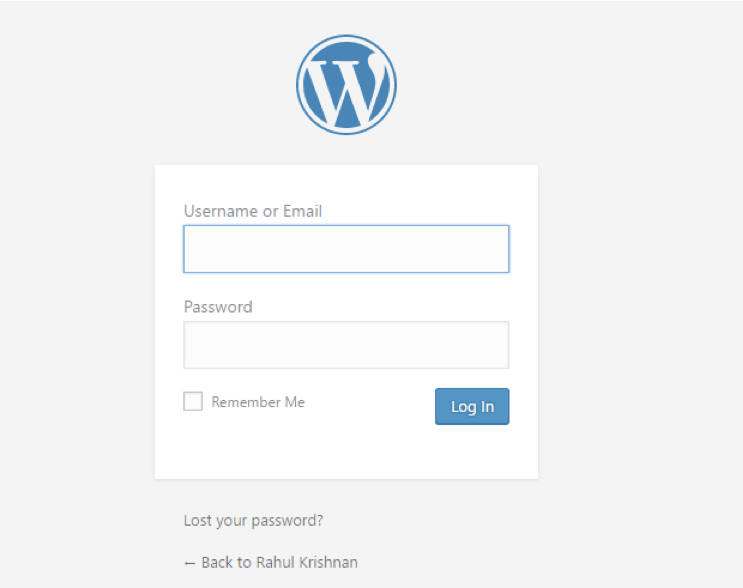
Step 1: First, log into your account using proper credentials. In case you don’t know the password, use the Forgot password link to reset it.
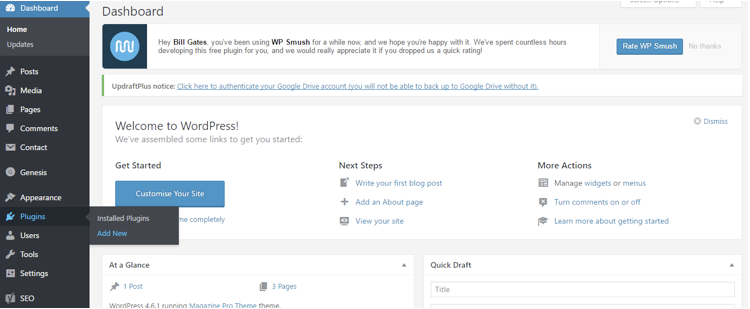
Step 2: When you reach the admin dashboard, follow Plugins>> Add new.
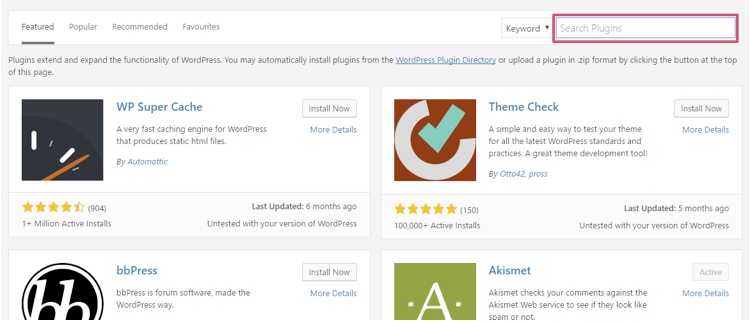
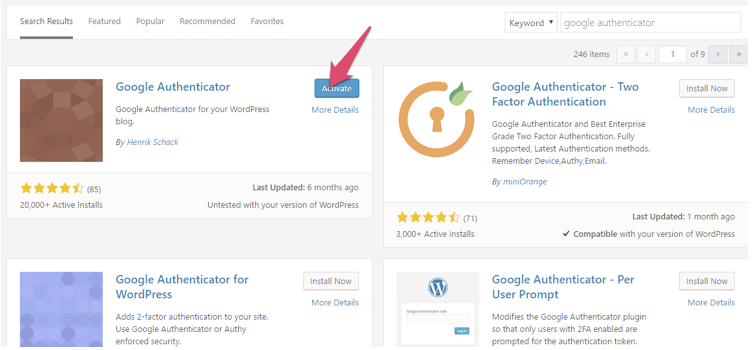
Step 3: Now, you can see a search field to get the exact plugin you want. Search for google authenticator there. The very first result is what we want.
Do you have a habit of installing plugin manually? Use the following link then.
Download Google Authenticator Plugin
Step 4: Just hit on the Install button.
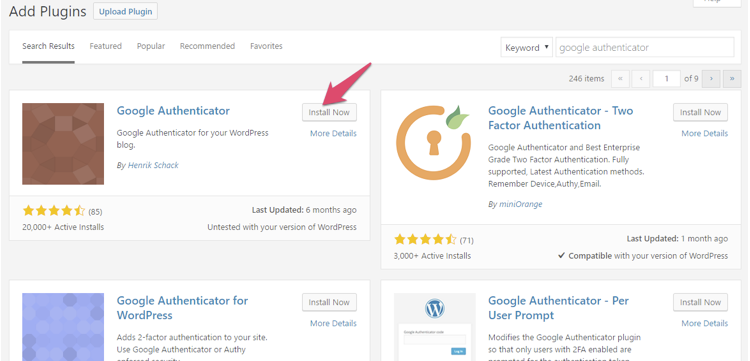
Don’t forget to activate the same as well.
If you have any active cache plugin, I recommend clearing all cache.
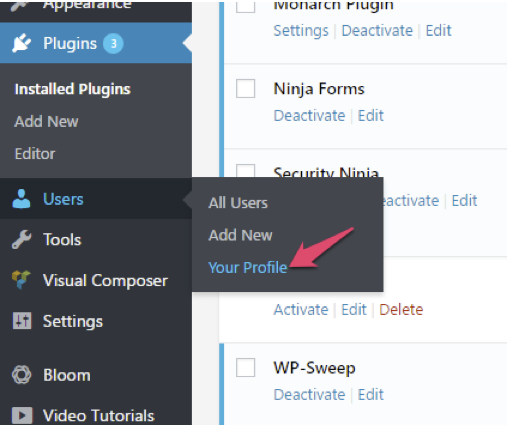
Step 5: You need to follow Users>> Your profile now.
We are going to setup the Google Authenticator settings now.
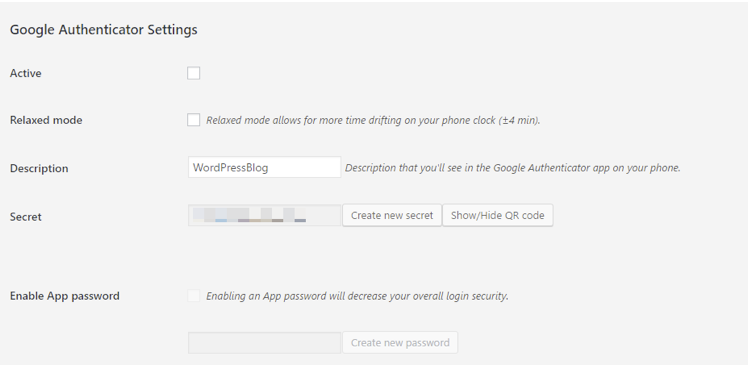
Step 6: Scroll down a bit to see a few options under Google Authenticator Settings. Read the following to understand each one given there.
Active:- Enabling this checkbox activates the plugin. Means, you can get two factor authentication on your site.
Relaxed Mode:- If your phone often stays in an area with less network signals, you must enable this. It will increase the duration, within which you have to enter the OTP.
Description:- It can be anything. The most suitable one is the name of your website. You can see the same on the mobile application.
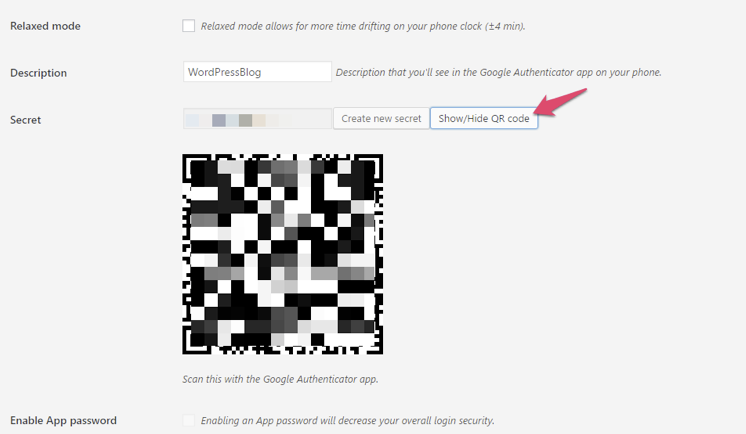
Once you go through all the three given above and activate the required ones, hit Show/Hide QR code.
Step 7: Install Google Authenticator application on your smartphone. You can use the link I just gave.
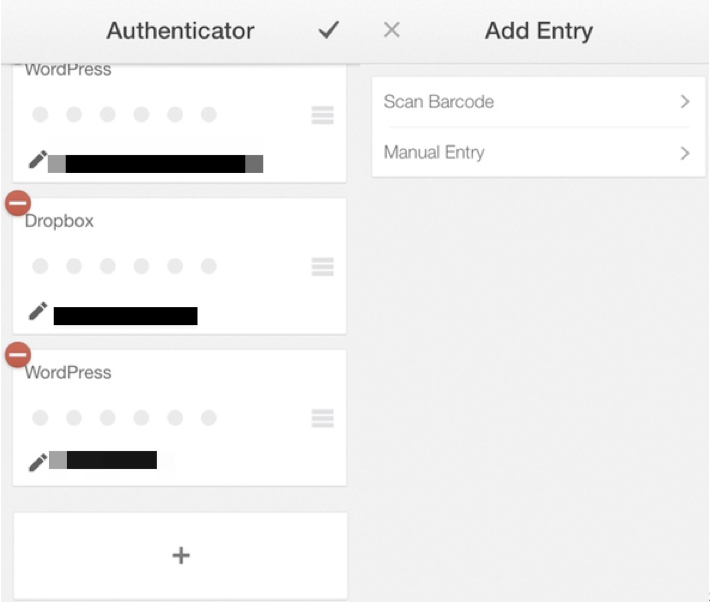
Step 8: Once you finish step 6, you get a QR code. We have to scan it using Google Authenticator.
Just press on the pencil button given on the upper-right corner of the screen. And, hit the plus button. Now, choose to go with bar code. Finally, scan the QR code when the camera gets opened.
The connection between the app and your site is finished.
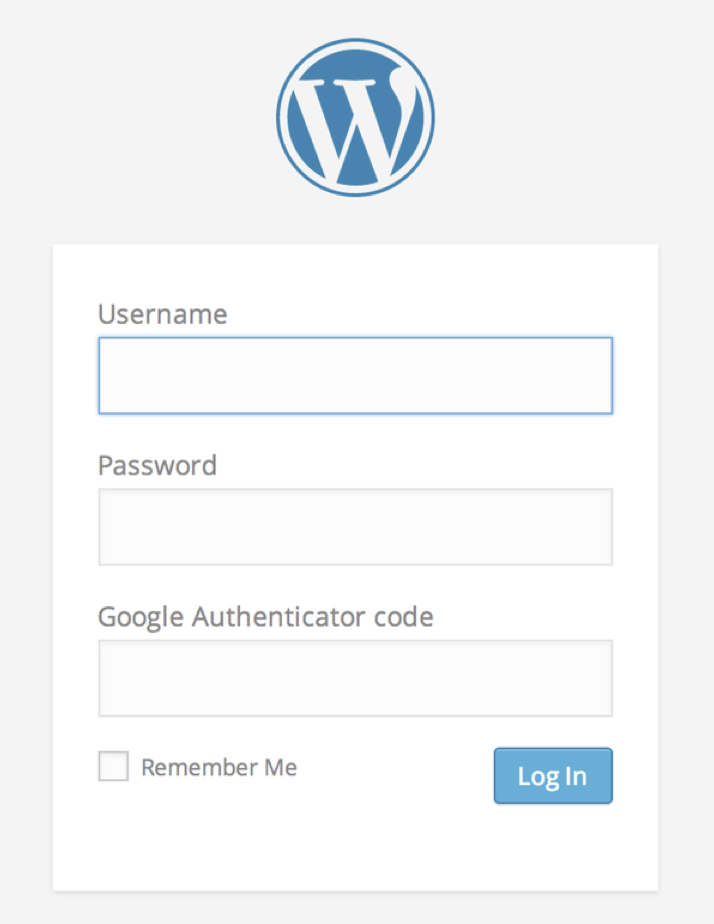
Step 9: For testing, logout of your site and, visit the login page again. You will see an additional field labeled, Google Authenticator code.
Enter your username and password as usual and, open the app. It will give you a unique code to enter into the third field. It expires every few minutes that you have to use a different one the next time.

Yaay! You have just set up two factor authentication.
What if you lose your phone?
Yeah, you will be locked out of your site.
The best way to revoke the access is deleting the plugin from cPanel.
Wrapping Up
You just learned how to setup two factor authentication in WordPress login.
If you have any doubt, feel free to ask in the comment section down below.