I know you are in love with WordPress, don’t you?
Have you ever thought of translating your site into your own language? I am not talking about the front-end translation, but the back-end translation of your admin area. It’s good to have the dashboard in your language, right?
So, in this article, I am going to show how you can translate your entire WordPress theme’s backend to any language you want.
First of all, let me tell you one thing.
Benefits of Having a Website in Your own Language
Not everyone uses English as their mother tongue. Tons of WordPress users are there for those English is a foreign language.
The following are some of the benefits of having a website on your tongue.
#1. It helps a lot for literary bloggers who write in languages other than English.
#2. Having the backend in another language reduces confusion among those of who don’t know English much.
I hope you now know it isn’t a bad deal to have a website in your own language. The process of translation can be done in many ways. I am going to explain both geeky and simple ways as well. So, lend me your ears and listen.
How to Translate WordPress Themes?
I have divided this section into different parts because translation can be done in many ways and each part explains different methods.
Are you ready to dive into the core of this post? Here we go.
Translation Using POEdit
Here, we are going to seek the help of a third-party tool called POEdit. It may sound a bit technical to you. But I am pretty sure that you will end up being an expert if you spare some time to test this tool.
So, let’s get started.
Step 1: Download POEdit tool from here. Irrespective of the OS you are using, you can download a copy. And, you can even make modifications to the software as they are providing the source code as well.
Step 2: After the download, you have to open that .exe file(for Windows XP,Vista,7,8,8.1,10) in order to install the software. It can be done in the same way that we install any other software.
Step 3: Now, the next step is finding your theme’s .pot or.po file. You can find a file with any of these extensions in wp-content/languages of your website’s file manager. Download a copy of the same into your computer.
Step 4: It’s time for the real act now. You have to open the POEdit software. Then, choose Fileà New Catalogue from POT/ PO file.

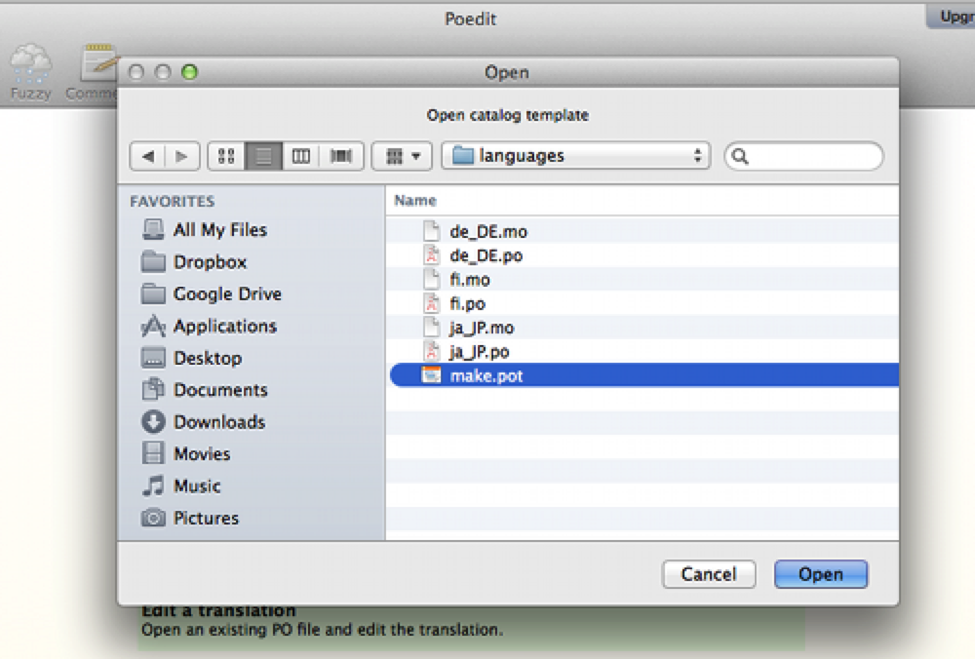
Step 5: A browsing box will appear using which you need to select that .pot file you downloaded.
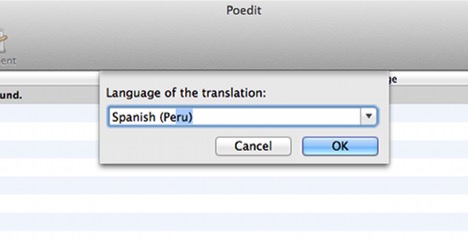
Step 6: Selecting the target language is the next step. Here, we chose Peruvian Spanish language. You can select any language that is listed in the dropdown menu of POEditor.
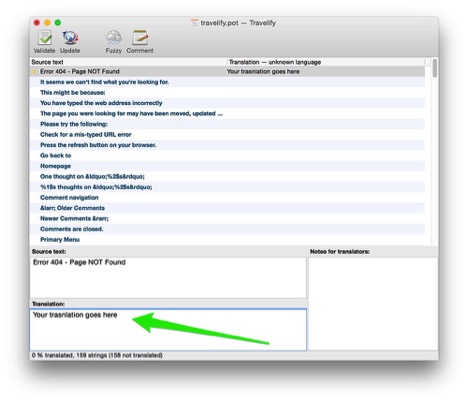
Step 7: Here comes the tedious task. You have to click on each source text and type the translation into the white bottom portion. (See the image for clarification). According to the number of source texts, this may take a bit time.
You can use Google’s translation service to find aptly translated string.
Step 8: After the above step is over, Save the file.
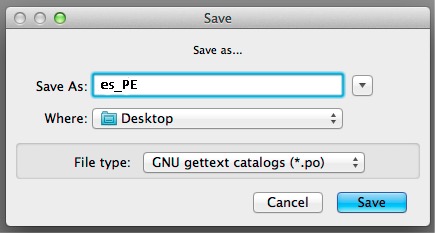
You can see two files as the output- a .po file and a .mo file as well. Never change the auto-generated name of the output file. Copy the file name without the extension, for further usage.
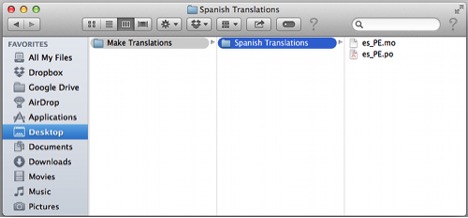
Step 9: Using your website’s file manager, upload both the files into wp-content/languages folder.
Step 10: The hard part is over now. Next, we have to tell WordPress to use the translated version. For that, open the wp-config.php file from the home directory and find the following line of code.
define (‘WPLANG’);
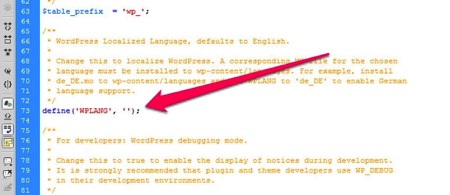
And replace it with define (‘WPLANG’ , ‘es_PE’);
‘es_PE’ is the name of that .mo file we created using POEdit. If you opt for a language other than Spanish, you will get a different file name.
Then, save the config file.
Hurray! You have done it.
Translation Using Loco Translate Plugin
If you are WP plugin savvy person, you will find this method to be comfortable. Follow the steps given below to translate your WordPress website to your own language using Loco Translate plugin.
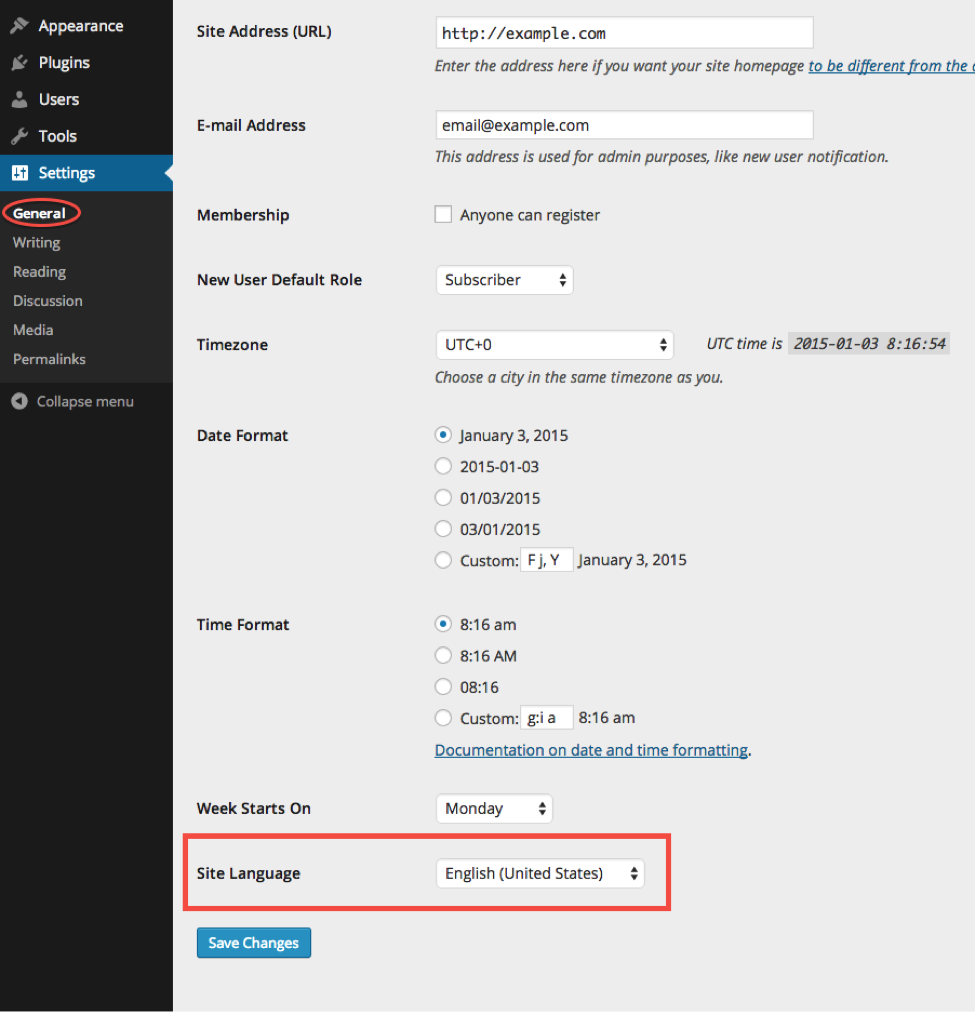
Step 1: Go to Settingsà General from your admin area. Then choose a language from the last option (Site language).
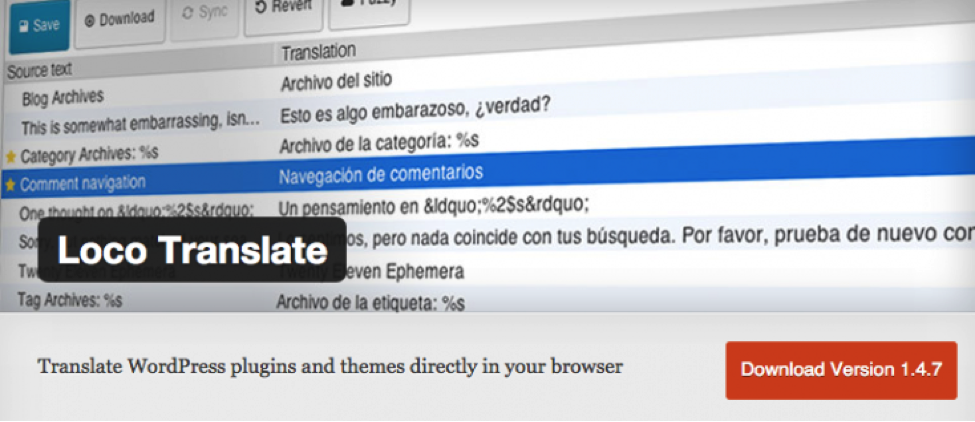
Step 2: As a WP user, I hope you know how to install a plugin. Go ahead and install Loco Translate. Don’t forget to activate the same.
Step 3: On activation, you will see a new menu on the left sidebar of your dashboard. Click on it and choose the plugin or theme you want to translate from the following screen. Then, click on New language link right to it.
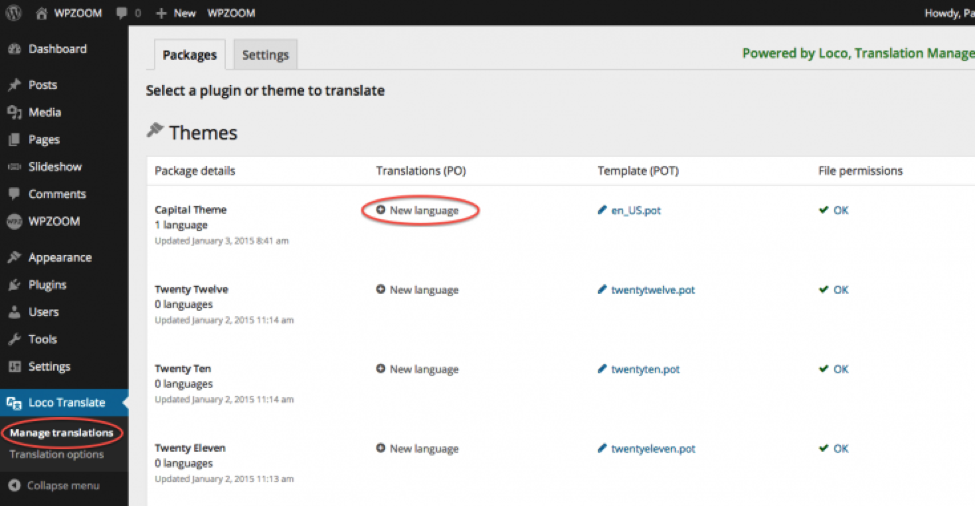
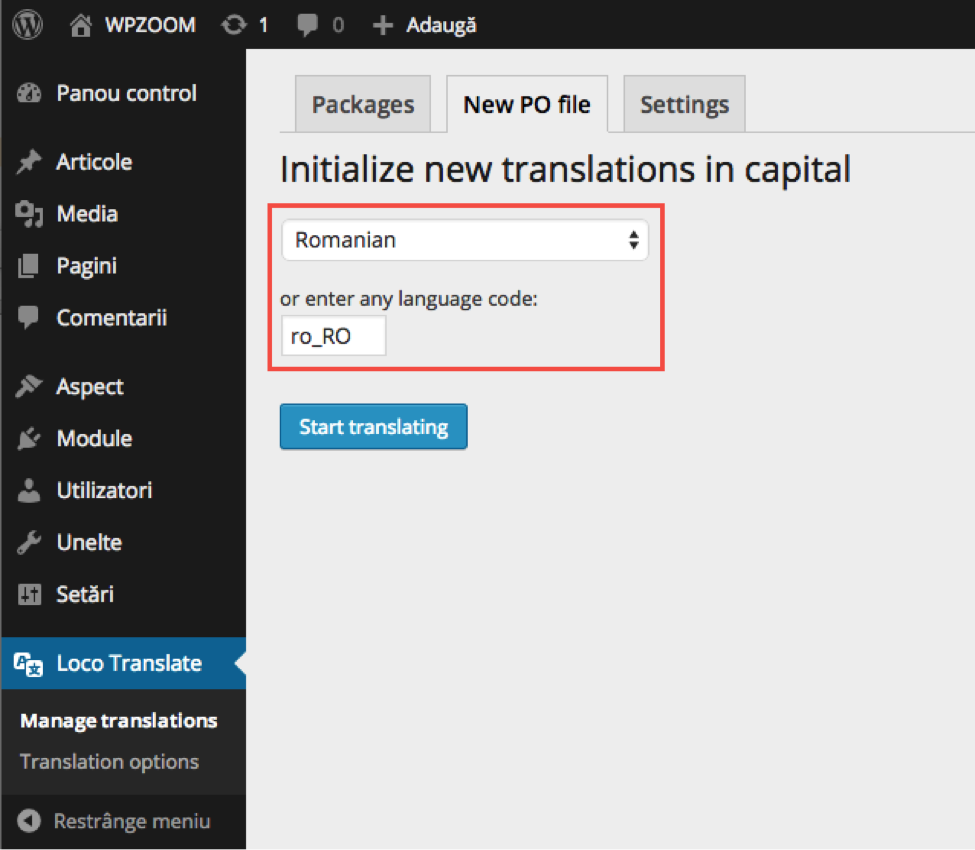
It will get you a list of languages. Pick one of your interests. Make sure that it will not contradict with the first option you selected.
Click on Start Translating.
Step 4: Now, you can enter the translated text into the last white portion of the screen shown. Here also, you should translate each on your own.
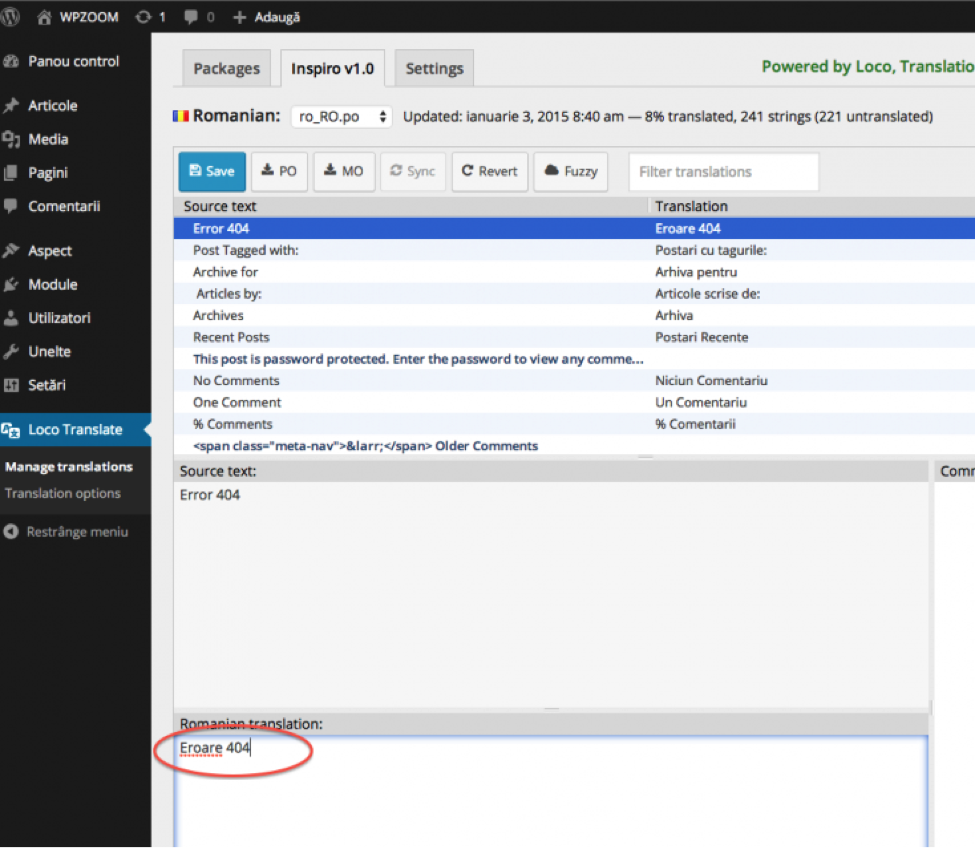
Once you finish the translation, click Save.
Pretty simple, right?
N.B. – Make sure to take backup of wp-content/languages folder. Otherwise, the translation may not work after updating the theme.
Using Some Other Tools
I am sure that the above methods are more than enough to translate your WP theme into any language. If you want some other tools, use the following.
#2. Google Translate Bar (for Chrome)
#3. Inline Translator (for Firefox)
Bottom Line
I hope you are left with zero doubts regarding this post. Still you can use the comment form to let us know what’s troubling you.
Try to follow every single step I have explained. Or else, the translation may not work well.
If you find this article useful, have a sec to share it with social media.